First steps with Scratch
Scratch™ is a videogame engine created by researchers at M.I.T. (Massachusetts Institute of Technology), which, beyond providing a graphical interface for the creation of videogames, aims to develop skills such as logic or lateral thinking, which are more and more demanded by companies.
Programming is not just writing code, but thinking about how to solve a problem in the best way. Steve Jobs, one of the founders of Apple, once said that “Everyone in the country should learn to program a computer… because it teaches you how to think“. So, the objective of this course is to learn how to reach your goals with the resources you have.
The advantage of Scratch is that you do not need to download and install anything to get started, all you need is an Internet connection.
To do this, go to: https://scratch.mit.edu/ and click on “Start creating” button to start with our project.
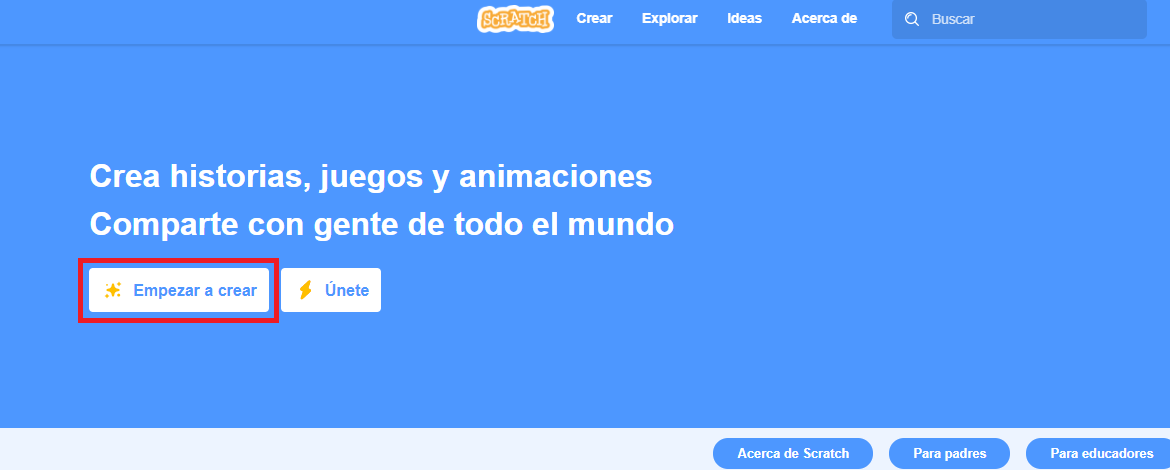
Figure 4. Main Scratch website.
Once we access the development environment, we will see something like the one shown in Figure 5. You can change the working language by clicking on the top left icon on the screen.

Figure 5. Scratch main interface.
The interface is divided into different sections:
-
-
COMMAND TYPESO
Scratch provides a large number of programming functions which are presented as pieces of puzzles. In order to facilitate the searching process, they are organised in the following categories:> Motion: It collects all the necessary commands for the movement of both the characters and the rest of the elements that appear on the screen.
> Apparience: Provides certain functions related to the game interface such as wallpapers.
> Sounds: It allows you to control aspects such as the soundtrack and the sounds of animations and collisions, among others.
> Events: Son desencadenantes, es decir, son circunstancias que tiene que cumplirse para que se ejecute una cierta acción. For example, when the user presses the ‘SPACE’ key on the keyboard (event), the character will jump (action).
> Control: Closely related to the previous one, but this category focuses on the so called loops and conditionals.
A loop is a set of actions that are repeated a certain number of times (or indefinitely), while a conditional, is and event like as: “If the character’s life reaches zero, then GAME OVER screen appears”.
> Sensors: Includes mouse-related functions, timers and stopwatches.
> Operators: Are simply pre-defined mathematical and comparative operations. Used to add and multiply numbers. They are widely used together with conditionals.
> Variables: We can define them as an element that stores values that can be modified. For example, a variable in our game could be ‘LIFE’, which will take an initial value of 100. Each time the character suffers damage, the value contained in the variable will be decreased by a certain amount (depending on how severe the damage is), until it reaches zero.
> My bloks: We can create new blocks with custimezed functionalities according to our needs. This is known in programming as “Functions”, which are blocks of code that performs a very specific operation. These functions can receive “parameters”, which are a kind of variable, but associated with functions. For example, if we want to create a function that calculates the square of two numbers, the parameters are those two numbers whose square we want to calculate.
Functions are a very useful tool in programming that allows to fight with what is commonly known as “spaghetti code”,which are those parts of our program where we have the same code repeated several times, instead of having a single code that we call as many times as we want. A key aspect of programming is order, so the tidier and cleaner our program is, the easier it will be to identify and correct errors.
-
AVAILABLE COMMANDS
It includes the blocks that make up each of the above categories. -
WORKING AREA
Here is where we will drag the puzzle pieces to create our video games. The advantage of Scratch is that we can put them anywhere on the screen. - SCENARIO MANAGEMENT
A game is usually composed of different scenes or scenarios, which appear as the player progresses. As the development screen is limited, it is possible to divide our levels into smaller sections. - GAME VISUALIZING
In this window we will be able to see the result of the game as we create it.
-
Once you are familiar with the interface, the next step is to create an account to save your project. For that, click on “Join Scratch” option at the top right corner of the screen. After that, different interfaces will appear asking for certain information (Figure 6) in order to create our account.

Figure 6. Create an account on Scratch
Before we start creating a game, we need to be familiar with the interface and how the block system works. To do this, we are going to make a small program that makes our character rotate in one direction and when we press the ‘Space’ key, it starts to rotate in the other direction.
As shown in Figure 7, the first thing we need to add in all our games is the block that is activated when we click on the green flag, which is the start icon of the game, which is in the display window, along with the stop icon.
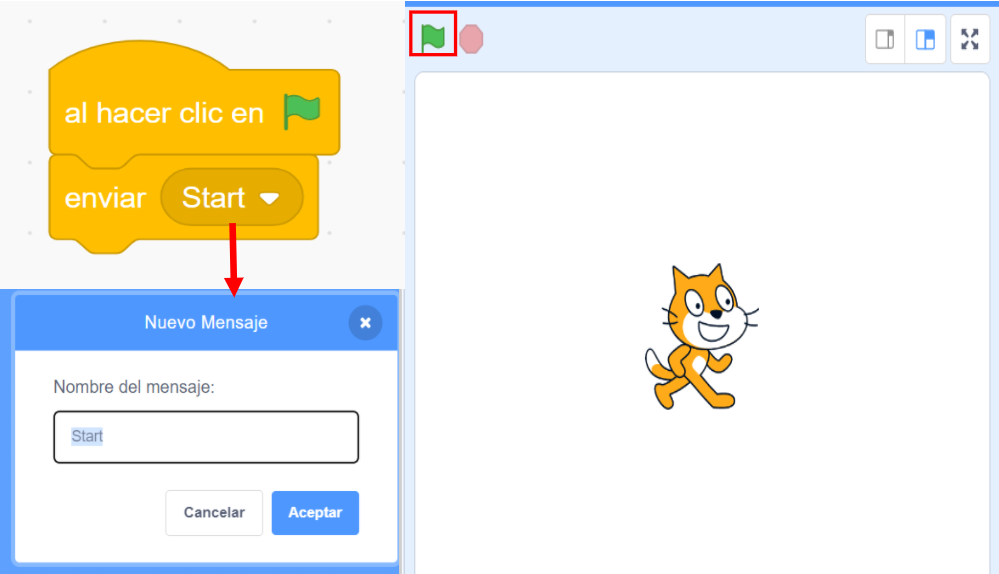
Figure 7. Sending ‘Flag’ when starting the game
When we start the game, we set a Flag, which we will call “Start” to TRUE to indicate to the rest of our program that the game has already started. But What is a Flag? This is the name commonly given to variables used to indicate an event. They are indicators that can only take two possible values, true or false (TRUE, FALSE). We can visualize it as a light bulb that turns on (TRUE) or off (FALSE) when we enter in a room. This information can be used to perform other tasks, such as playing a sound, displaying the game menu, or in our case, making the character start rotating.
Now that we know that the game has started (Start = TRUE), we must make the character rotate, for this, we will implement the blocks in Figure 8. For this we use the 15º clockwise rotation block, shown in Figure 8, but as we want it to never stop rotating, we must add an “Infinite Loop”, which will execute whatever is inside it constantly.
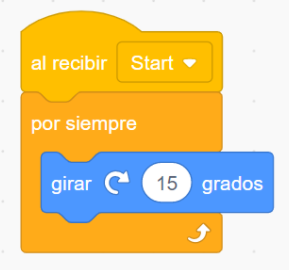
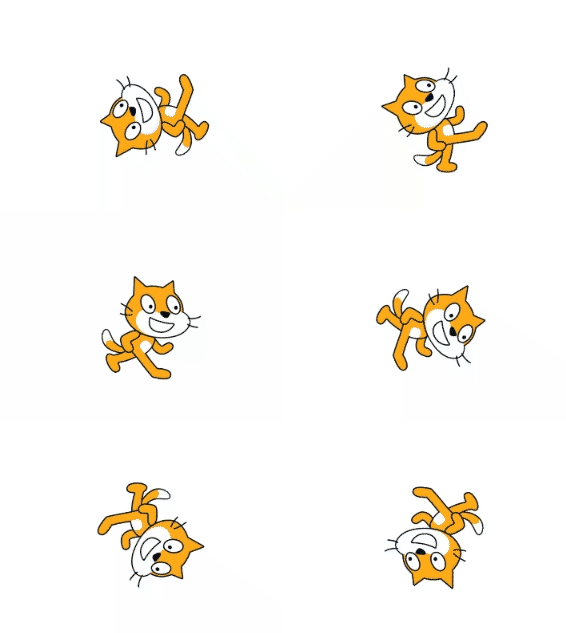
Figure 8. Perpetual character rotation
What if we change the angle of rotation? As it is inside of an infinite loop, varying the angle of rotation affects how fast the character will rotate. If we set a value of 1, we will see that the character rotates much slower.
We already know how to rotate our character in one direction, now we have to reverse the direction of rotation every time we press the ‘SPACE’ key. There are many ways to do this, but if we take into account that the sign of the number of rotation degrees of the block in Figure 8 determines the direction of rotation (if it is positive, it rotates clockwise, and if it is negative, counterclockwise), the easiest way is to change the sign each time we press the ‘SPACE’ key.
To do this we must create a variable called ‘Rotation’, which will contain the degrees to rotate (we will set 15 by default) and the direction of rotation. To create it, click on the ‘Create a variable’ option in the Variables section. As shown in Figure 9, we will see a window for set the variable, in this case Rotation.

Figure 9. Variable creation on Scratch
Every variable must be initialized, i.e. it must have an initial or default value. For that, Scratch has a series of specific blocks. Figure 10 shows the different options available.
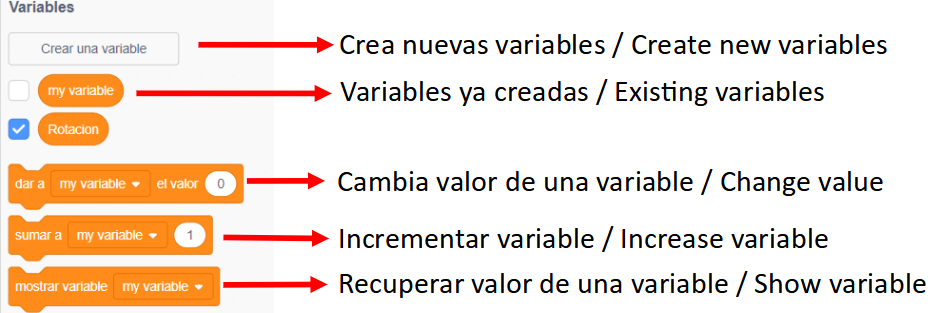
Figure 10. Variable options
In our case, we are going to define a variable called Rotation that will have an initial value of +15, just before sending the start event ‘START’. The order in which the blocks are placed is important. By initializing the variable before starting the main loop, we ensure that the direction will not be altered moments after the loop starts.

Figure 11. Initialization of variable Rotación
Now we must associate the angle of rotation with the variable Rotation; to do so, we must replace the value of the block by the variable Rotation that we have defined.

Figure 12. Set the variable Rotation as angle of rotation
The next and last step is to make the value of the Rotation variable change every time the ‘SPACE’ key is pressed. For that, we add the block shown on Figure 13. Since all we want to do is change the sign, we multiply the value we already have stored in the Rotation variable by -1; so, if the stored value was 15, pressing the key will make -1*15 = -15, and if we press it again, -1*-15 = +15.

Figure 13. Rotate and invert the character by pressing the ‘SPACE’ key.
Now, if we click on the green flag icon, we can run our program and see the result.
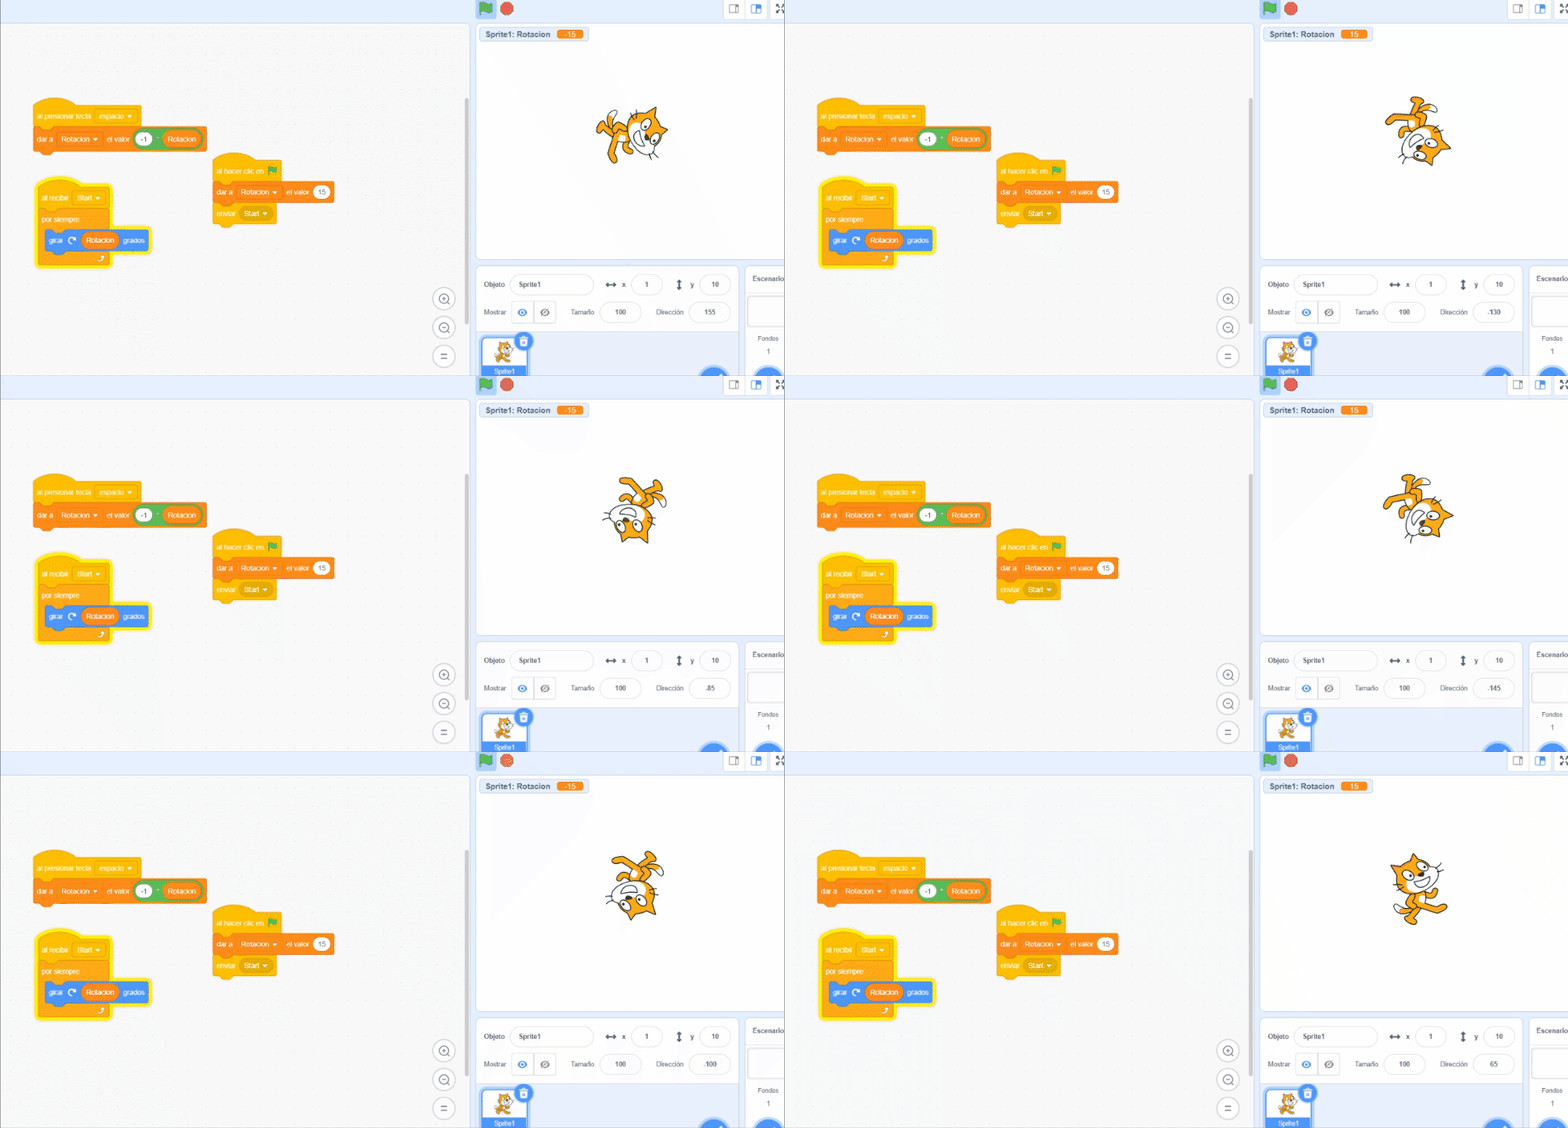
Figure 14. Final results of lesson Nº1
With this lesson we have seen how to operate the Scratch development environment and block system from a very basic perspective.


